About The Project

About The Project

Thursday, May 26, 2016

Interview Time! Just a quick question:

Why Heisey?  What got you hooked on collecting it? 

Mother had a few pieces of Heisey but I remember distinctly her overall love of cut glass.  The Heisey pieces in her collection which I remember most are the Greek Key jelly bowl and the salt and pepper shakers.  Actually,  I only found out  that the salt and pepper shakers I'd loved for so long were Heisey after I had inherited Mother's entire glass collection.  She probably had at least ten pieces that came to me at that point, and those pieces really galvanized my fondness.  My mother was really into cut glass later in life but she had always liked to use her glassware for serving and display.  She simply thought the glass was beautiful, and therefore I naturally thought so too.  When Mother's love of glassware really started to become a genuine collection, she was a member of the local Questers chapter and so was I.

Mother introduced me to the Questers, an organization of brilliant people who are dedicated to restoration, preservation, collection and simple adoration of all things antique.  (My daughter calls it "antique collectors anonymous" but it's so much more than that!)  Together, Mother and I enjoyed the club meetings and activities and we learned a great deal about all of our collections; not least of which being Mother's cut glass and her precious Heisey.  Maybe being a part of Questers let me discover my passion, maybe it just fed the "addiction".  The fancy grew slowly at first.  But as anyone who loves Heisey knows, the more one looks, feels, uses, studies the glass the more wonderful it becomes. 

Even as I work with the glass on this project, the more I truly appreciate it.  Every piece I work with for this project has a little something to show me, to teach me.  Everything sparkles and invites adoration.  It's not hard to love Heisey.  Obviously.  Of all of the things in the world to be "addicted" to...  I could do a whole lot worse!

Saturday, May 7, 2016

Details Details Details

They say "The devil is in the details."

And in this case, that couldn't be more true.  Except, instead of "devil", let's say "beauty".  And instead of talking about it, let's just look at some pictures of how far we have come.  Can you see some of your own favorite patterns appearing in the final product yet?


It's just a scuff, but it came with the glass.  It's perfectly imperfect.

That copper color is the un-soldered foil.  The silver blobs are solder melted through from above (or accidentally splashed on the glass (top center).  These between-areas are going to all be smooth silver solder when I'm done with them!


Better than a handful of diamonds, these are nuggets from stemware!
This is where those nuggets come from.
Before and after, if you will.

Can you see the pattern in the cup I'm holding and where it correlates to the same pattern in the piece I'm indicating?  Need a hint?  Find the ribbon.


Friday, May 6, 2016

Interview time!

Tell us about the tools you are using for this project.  What does the process look like for a project like this?

There are several tools being used for this project, most are quite familiar to even the newest members of the stained glass club.  The glass cutters I use are about as basic as could be, and many date back to my own earliest days in the medium.  Many are older than my own, grown children!  The glass cutter is a scratching device that scores a single line into the glass, making a weakness in the glass along which I hope it will break.  I say "hope" because the glass often has its own designs on how to break.  Lots of practice can help dial in the accuracy of these early steps, as can my array of various pliers which are designed to control the break.  If the cut/scoring is done properly, and a confident technique is applied to the break, I am rewarded with a clean SNAP and nice smooth edges to work with in my pieces.  If not - well, things get messy pretty quickly and then other tools come in to play for the "recovery" phases.  

There are multiple pliers in my arsenal which exist explicitly for "grozing" the glass edges...  that is to nip away at the jagged edges that didn't cooperate and to pull off as much of the razor sharp shard as possible.  Once the glass is manually cut and grozed to size, it's time to use the electric grinder to grind away any final errors in my desired shape.  Even the smallest burr can mis-align a piece and every piece needs to nest perfectly next to its neighbor if the window is to come to an exact, pre-determined measurement.  Sometimes my windows and projects CAN grow, and it's fun to allow the glass space to do its own thing.  But in this case, the finished panels must fit into the existing door spaces.  So no surprises are allowed!

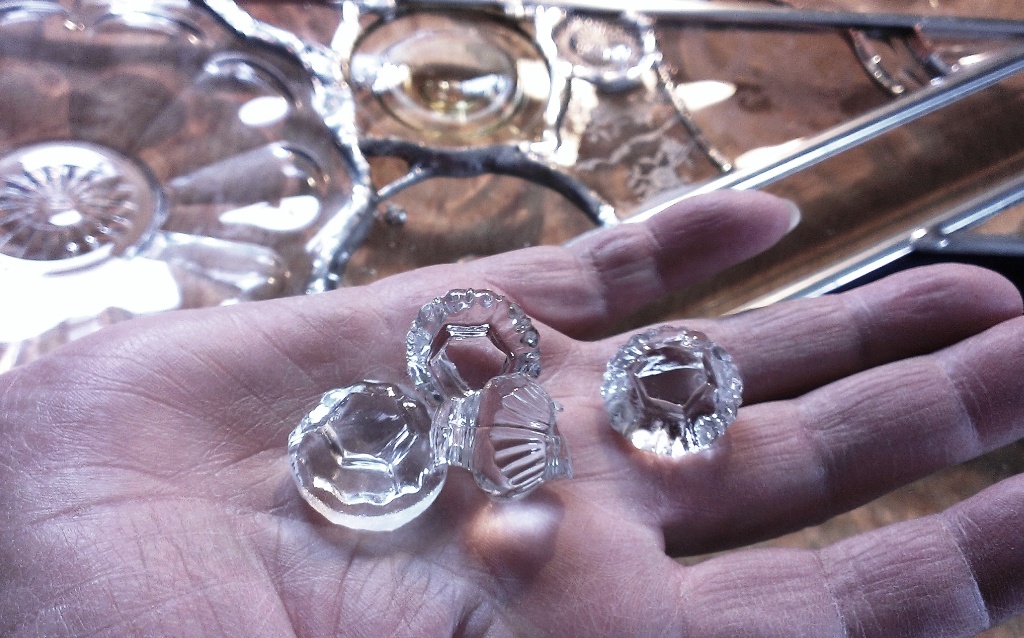
When it comes to building a window out of dishes, bowls, cups and saucers, a whole new series of cutting complications arises.  Glass likes to break along weak spots, or lines that are thinner than the rest of the glass.  So a piece of glass with a pattern already scored or molded into it is a completely different creature from what I normally work with.  It is for this purpose I bring to task my newest tool, a ring saw, which can grind a thin gap down a solid plate (for instance) to separate it into two or more pieces without the danger of having to snap it and hoping it goes the way I want.  The ring saw allows me to carve into a three dimensional bowl or dish much more easily than any of the other tools I could use.  It's been a dream come true for this project!

Next, when the pieces are all cut to size and fitting perfectly, it's time for foiling or calming.  Foiling is the process of applying a thin adhesive copper tape to the edges of each piece so that they can stick together.  If the pieces are large (like the center "H" on each panel) I can use calming (pronounced "Cay-Ming" to rhyme with framing).  Calming is an H-shaped strip of metal that is used to hold glass in place in the finished window.  It's very hard to use with small details, but for the larger pieces it does the job perfectly, as it has done for centuries of glass workers before me.

After the foiling, the pieces are still loose, so it's time to "glue" them together.  A quilter uses needle and thread.  A stained-glass-window maker uses solder (pronounced "sodder")  This is a simple process of applying an acid to the copper foil around each piece of glass (to clean it and make the copper accept the solder) and then melting the lead solder into place.  It's the same process used for fusing electrical components together, just on a much bigger scale!

When every millimeter of my design is foiled and soldered, and every joint and connection has been adequately sealed and checked for good adhesion, it's time for my "favorite" part:  Cleaning. Cleaning each window is actually quite a chore, but it is critical to the success of the final product and making sure it's done right.  This is not the time to get lazy!

Cleaning each of my windows takes some pretty interesting problem solving, and for a long time I've simply carried the window to the bathtub for a good scrubbing. Soap and water works just fine, but some vinegar solutions or even good old formula 409 can get the grease off a little faster.  For tough grease and marker lines, there's nothing like my beloved BonAmi! (I have not been paid to make these claims, FYI.)

This is a great time for quality control and to run my fingers over the entire project to make sure that nothing's loose and there are no missing pieces or forgotten lengths of copper foil to be attended to.

Once cleaned, it's time for delivery and installation and I have to say "goodbye" to my newest creation.  It's often hard to leave a piece I've spent so much time on, but it's always a pleasure to see the finished product in its final home where it belongs.  Glass doesn't work without light shining through it.  And as pretty as my work is on my worktable (or in the bathtub!) it's always so much prettier where it belongs.  

My other tools include what you'd expect of any artists' table, I suppose, with rulers and straight edges, and paper towels and cleaning supplies and markers and pencils and paper of all sizes.  My layout tables are nothing more than re-purposed doors themselves.  My favorite tools are my secret weapons:  dental tools.  Those are perfect for getting into the fiddly little corners and edges of glass nested TOO perfectly together, and they come in so many useful shapes and sizes.  I don't know where I'd be without them!  Popsicle sticks are indispensable too, when it comes to laying out glass (or in this case dishes) with different thicknesses and depths.  Popsicle sticks, dental tools, pushpins and about ten thousand other makeshift solutions find their home in my workshop.  Glass isn't demanding beyond a little respect and a little education.  Heisey, of course, demands its own reverence, but it's still the same stuff I've always worked with before. Like an old friend in a shiny new outfit.      

Each design has its own story to tell.  Each piece of glass is a tiny little adventure.  

With these panels?  The adventure is blooming before my very eyes and I couldn't be more excited to be a part of this engaging, inspiring project.

Monday, May 2, 2016

Considering Glass in Multiple Dimensions


In this image you can really see how the different shapes and sizes of these pieces are coming together.  I have plates (and fragments) that go from "reasonably flat" to "Oh lord how will this fit".  I am incorporating everything from the etched or moulded patterns inside the glass, to the lovely edges surrounding them.  I even have the custom Heisey beads in my window to make sure we have all the bases covered.  Look at this picture carefully and see if you can find a difference between the thinnest areas (a standard 1/16th of an inch) to the really mechanically challenging areas (a demanding 5/8 of an inch).

Why all the fuss and fractions?  The door itself is going to be mounted within moving (and real) doors.  The panels will therefore need to fit inside an approximate 3/4 inch depth, like a sleeve.  However, it's not just these panels we're putting up there.  Each panel will be encased (the sleeve) in a flat piece of plate-glass on either side to protect and maintain the original panels.  That plate-glass feature is not just good sense, it's the law.  So there's no skipping that step!

It's a lot to consider when putting a window anywhere, add all this extra depth and structural support and things get pretty complicated pretty fast.  Inches, fractions of inches, and fractions of fractions of inches become critical almost immediately.  Planning ahead and good communication with the installation team will be the key to the success of this project.


Pretty!


This is a pineapple.  It comes from the center of a platter.
Hoping to get this featured proudly in one of the dedication panels.

Soldering!  (and soldiering on!)
Here you see work being done on the "back" of the window.


THIS is a sturdy window.  Heisey glass is already plenty strong.
Now it has loads of support built in and will make a beautiful, secure door panel!

Detail showing a diamond "H" and the Heisey Rose.
Also featured:  PRETTY!
Oh boy is this going to be lovely!

May Heisey Article

SO, HOW ARE THE FRONT DOOR PANELS COMING ALONG?


The first upper panel is assembled and soldered.  It now needs lots of cleaning.  The Heisey Rose pattern is included as well as two beads.  Both can be seen in the detail photos.  There are also open spaces in the work to allow for a certain amount of “air” movement within the panels.  The second upper panel is well underway with both the layout and the assembly progressing nicely.  The lower panels, containing the dates and dedication information, have much of the pieces organized and set aside.  The basic layout is also drawn.  These two panels will have the official data sandblasted into cobalt blue (to match the upper panels’ cobalt blue) pieces of non Heisey class.

The main concept for these panels continues to be to include as much variety of Heisey glass as possible, including the colors and etchings as well as patterns.  Most of the glass is coming from broken and damaged pieces.  However, members have been very generous in also donating undamaged glass, which are being used as whole pieces as much as possible.  All the scrap glass not useable in the panels will be returned to the museum to be melted down for further use in museum projects.  A full photographic and written record of this project is also being created for possible use as a booklet/fund raiser                     


P. S.   I still do not have any Dawn or Ivorina Verde for the panels